Creating Flows are great, but if your Users can’t get to them, they don’t help too much… It’s time to create a button to allow your Users to launch the Flow!
Start by capturing the Flow details. In the Learning Flow series, you should have created a Flow with a Unique Name of Quote_Entry and the URL should be /flow/Quote_Entry. You can get to the Flow details by searching Flows in the Setup search bar and clicking on the Flow you are looking for the details about.

Now, there are a few ways to be able to create a button. One way, using the Flow URL, can be found in the post, Update a Record Through a Button and Salesforce Flow. The other way is through a Visualforce page. I know, you’re expecting to learn about Flows here. There is a lot of power by being able to use a Visualforce page to start a Flow instead of using the URL. You’ll start with a basic Visualforce page in this post and in future posts, you’ll learn how to enhance the page to continue to improve your business processes and customize it for your business.
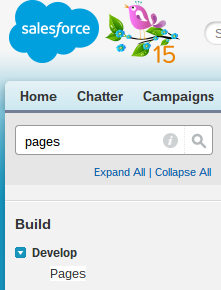
To create a new Visualforce page, go to Setup and search Pages in the Setup search. Click on Pages.
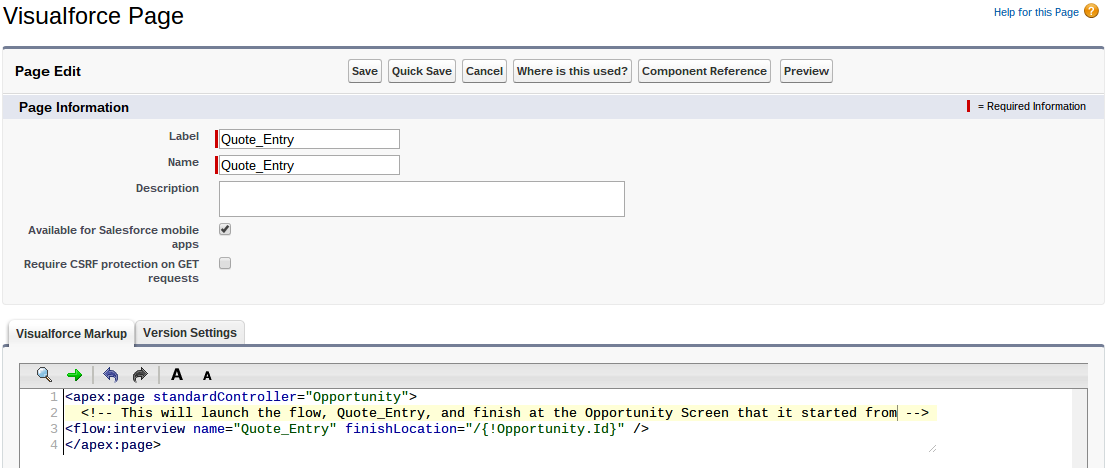
There are two ways to create a new page. You can click on Developer Console or New. For this lesson, click on New. Type Quote_Entry as the Label and Name. Since you’ll want your Users to use this in Salesforce1, check the box for Available for Salesforce mobile apps.
 Now, in the <apex:page> section, you’ll want to type before the > standardController=”Opportunity”. Since you’re starting the Quote Entry Flow from an Opportunity (at least for this page), you’ll want to tell the page, use the standard Opportunity object fields and information as a starting point. The next part, <!– Begin Default Content REMOVE THIS –> is a comment. Comments are important to add into your code so that you know why it is there and so other people can read it to understand why something below it is there. Change the
Begin Default Content REMOVE THIS
to say
This will launch the flow, Quote_Entry, and finish at the Opportunity Screen that it started from.
Your full line for the second line should read, <!– This will launch the flow, Quote_Entry, and finish at the Opportunity Screen that it started from –>. Now, delete lines 3, 4, and 5. You should have a total of 3 lines. Create a new line, the new line 3, between lines 2 and 3. For that line, you’ll enter
<flow:interview name=”Quote_Entry” finishLocation=”/{!Opportunity.Id}” />
This is telling Salesforce that you want to launch a Flow (flow:interview). The Flow you want to launch is the Quote_Entry Flow. When the Quote_Entry Flow is done running, you want to return the user to the original Opportunity. The finishLocation tells Salesforce, when the Flow is done running, finish at this URL. The /{!Opportunity.Id} is telling Salesforce, use the standard Salesforce URL and add a / and then the Opportunity Id. You’re able to write {!Opportunity.Id} because you set the Standard Controller as Opportunity, which means that if you want to reference an Opportunity field, in this case Id, Salesforce knows the field and the value of it. If you’re familiar with Salesforce URLs, you’ll know that whatever your Salesforce URL is (for example, na16.salesforce.com), if you add a / and the Id of a record, you’ll navigate to that record. So, by telling Salesforce go to /{!Opportunity.Id}, it doesn’t matter what your Salesforce URL is (handy for using the same URL in a Sandbox and Production!) as well as you’ll go back to the same Opportunity that you started from. So far, the page should look like this.
This is a great start! For some Flows, this might be enough to launch the Flow successfully. Since the Quote_Entry Flow is expecting a few starting variables, it won’t work for this Flow. So, you’ll need to add just a couple more lines so that the Flow launches correctly.
Since your Flow looks up the User from the vUserName variable and the Opportunity from the vOId variable, you’ll need to tell the Flow what those variables are inside your Visualforce page. To do this, create a new line 4 between lines 3 and 4. To tell Salesforce what a variable is, you’ll need to add <apex:param/>. For <apex:param/>, you can add name which will give the variable a name and value which will give the variable a value. So, you’ll want to enter <apex:param name=”vUserName” value=”{!$User.Username}”/> to tell Salesforce, create a variable, named vUserName, with the value of {!$User.Username}. The $, in easy terms, is letting Salesforce know to look for a system variable instead of a Standard Controller variable. Since Users have variables that are assigned to them as they use Salesforce, this tells Salesforce to look at the Users fields of the User using Salesforce. So, {!$User says, look at the User fields of the User, and .Username} finishes that by saying, look at the Users’ Username.
You’ll want to add one more line, line 5, between lines 4 and 5, that says, <apex:param name=”vOId” value=”{!Opportunity.Id}”/>. Since the Standard Controller is Opportunity, this tells Salesforce, go look at the Opportunity, find the field Id, and use that for the variable value, and name the variable vOId. Now you have two variables assigned using the same names as the Flow variables which will allow you to pass those variables (since they are Input and Output variables) into the Flow.
The last part to finish the Visualforce Page, you want to delete the / at the end of the flow:interview line 3 (/>) and create a new line, line 6, between 5 and 6, with the line saying </flow:interview>. By deleting the / in the 3rd line and adding </flow:interview> as line 6, you’re letting Salesforce know that everything in between <flow:interview> and </flow:interview> should be looked at and passed to the Flow. Your screen should look like the below image.

Click Save. Now you need to add a button that you can later add to a Page Layout. Go to the Setup section, click the drop down arrow next to Customize, click the drop down arrow next to Opportunities, and click on Buttons, Links, and Actions. Click New Button or Link. Enter the Label as New Quote and the Name as New_Quote. Make the Display Type a Detail Page Button, behavior as Display in existing window without sidebar or header, and the Content Source as Visualforce Page. When you do this, you’ll see the page change and you’ll see a Content drop down. Select Quote_Entry from the Content drop down.
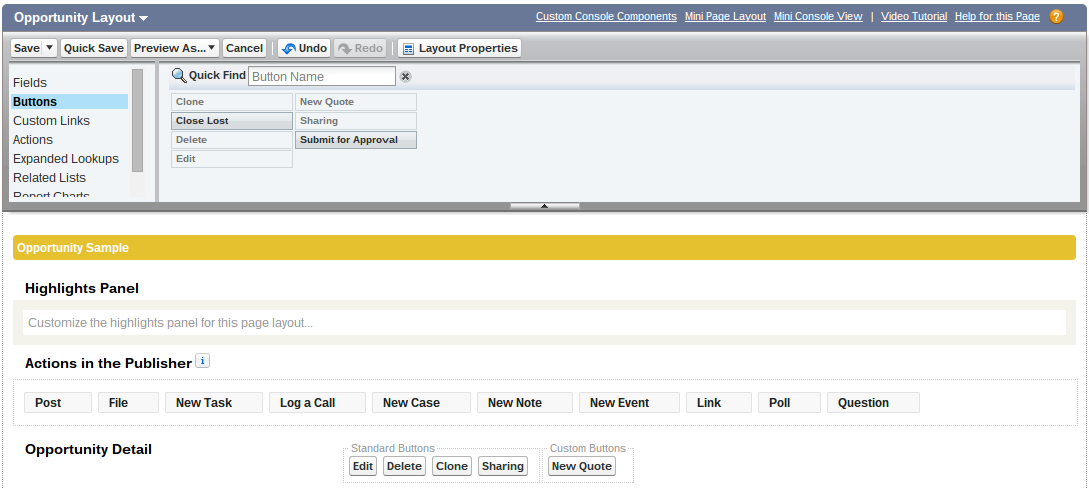
 Click Save. You’ll get a popup that lets you know you need to add the button to a Page Layout in order for Users to see and use it. Go to the Opportunities Page Layouts section in the Setup section. Depending on the Page Layout you want to add it to, click Edit next to the Page Layout. For this lesson, click the Edit button next to Opportunity Layout. On the left, click on Buttons, and drag the New Quote button into the Opportunity Detail section with Custom Buttons.
 Click Save. Now go test it out! Go to an Opportunity and you’ll see your new button at the top of the Opportunity Detail section!
 Click the New Quote button. You should see, depending on the Account, either the Address Information Screen you created or Quote Information Screen you created. Congratulations, you’ve created a Visualforce Page that will help you to launch your Quote Entry Flow!

If you desire to grow your know-how only keep visiting this site and be updated with the most up-to-date news update posted here.
LikeLike
This is a great Tutorial!!!! I was able create my first quote process up to 1.E. Very easy to understand . Thank you so much for the resource and the time you have put into it. I just have one question about the message on a blank page once the quote is created.
Formula Expression is required on the action attributes.
Thank you in advance for your support.
Isabelle
LikeLike