Some things just go together, like:
Peanut Butter and Jelly
Bread and Butter
Cinnamon and Sugar
Tom and Jerry
Thunder and Lightning
I’m sure you get the picture! Now, I’m still warming up to the idea of calling Flows Thunder, but they go together with Lightning Process Builder just like Thunder and Lightning. The same way that Lightning comes first and is followed by Thunder, Lightning Process Builder can run and kickoff a Flow as an output. You get an update in a flash followed by a roar of business process! Ok, enough with the symbolism!
This For The Community post has been brought to you by the world famous Salesforce Community, the Official: Salesforce Workflow Automation group! Thanks @Jay Singh!
Jay came to me with a question:
Hey Rich,Hope you are doing well! I know that you’re a Salesforce flownatic and I just happened to bump into something while creating a flow. I’m trying to get the Contact Roles from the Account module and try to get them to populate over to the Opportunity Contact Roles. So if a Contact Role gets created under the Account, it should appear automatically on the Opportunity’s contact roles. DoThanks in advance,Jay Singh
As I told Jay on my initial response, kicking off workflow from the Account Contact Role doesn’t quite work with the Standard Salesforce Account Contact Roles. A Custom Object can be used to kickoff workflow, so, upon his blessing to use a Custom Object, we’ll look at how to accomplish his question using Process Builder to launch the Flow. He also said that:
it should update all Opportunities and should only include the Contacts that I am adding from the Contact Roles
Ok. Custom Contact Role tied to the Account, when that is launched, add the new Contact Role as an Opportunity Contact role to every Opportunity on the Account, that’s our goal. Let’s get started!
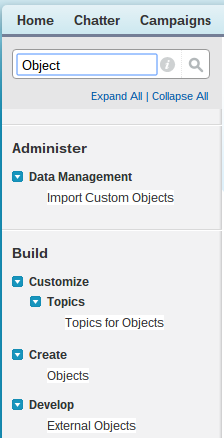
First, a Custom Object needs to be created. Go to Setup and in the Search bar, type Object. Click on Objects under Create.
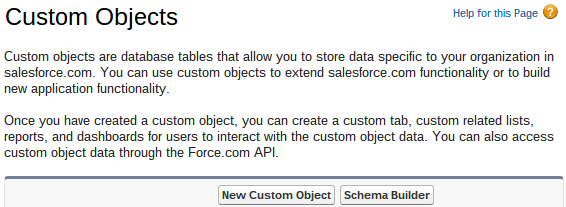
Click on New Custom Object.
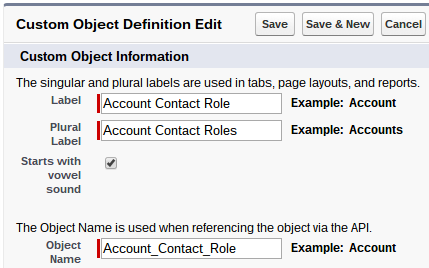
Enter the Label as Account Contact Role and the plural label as Account Contact Roles. Click the box for Starts with a vowel sound. Salesforce should have set the Object Name for you.
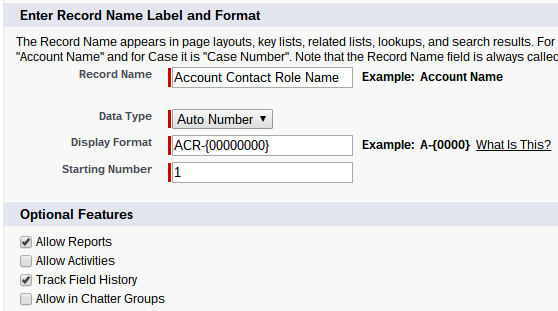
Next, make sure the record nae is Account Contact Role Number, the Data Type is Auto Number, the Display Format is ACR-{00000000}, the Starting Number is 1, Allow Reports is checked, and Track Field History is checked.
Click Save. Congrats, we now have the Account Contact Role custom object! It’s not actually related to the Account object yet, so let’s create a New Custom Field.

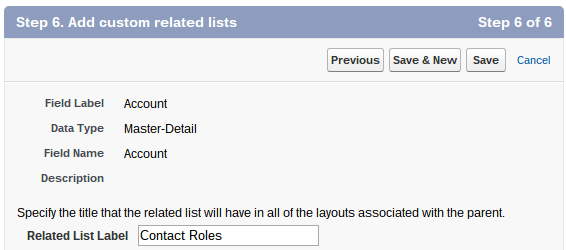
Set the Data Type of this field to be Master-Detail Relationship, the Related To as Account, the Field Label and Field Name to Account, and the Child Relationship Name to be Account_Contact_Roles. Click Next. Click Next. Click Next. On Step 6, Change the Related List Label to be Contact Roles.
Click Save & New.
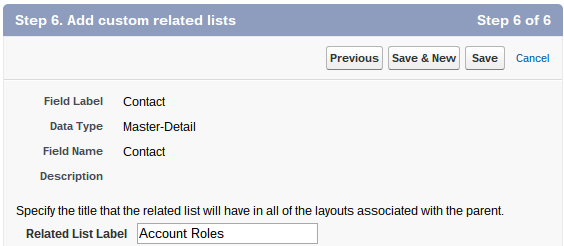
Set the Data Type of the new field to Master-Detail Relationship. Click Next. For Related To, select Contact. Click Next. Set the Field Label and Field Name as Contact and the Child Relationship Name to be Account_Contact_Role. Click Next. Click Next. Click Next. For Step 6, Set the Related List Label as Account Roles.
Click Save & New.
Now, you’ll need to create the fields that the standard Account Contact Roles has. There are 2 fields, Role and Primary. So, for this field, set the Data Type as Picklist and click Next. Enter the Field Label and Field Name as Role and set the values to:
Business User
Decision Maker
Economic Buyer
Economic Decision Maker
Evaluator
Executive Sponsor
Influencer
Technical Buyer
Other
Click Next. Make the field Visible to all. Click Next. Click Save & New.
Set the Data Type to Checkbox and click Next. Enter the Field Label and Field Name as Primary. Click Next. Make the field Visible to All. Click Next. Click Save.
Ok, great, you’ve created a Custom Object to replace the standard Salesforce Account Contact Role. Now, with the Custom Object set up, let’s go to the Account Page Layout. Add the newly created Contact Roles to the page layout. You’ll know the difference between the two because the standard Contact Roles will say, “This list is not customizable”.

Make sure to update the Contact Roles Related List to show the same information (or what your business needs) that the original Contact Roles Related List has.

Make sure to remove the standard Contact Roles Related List from the Page Layout!
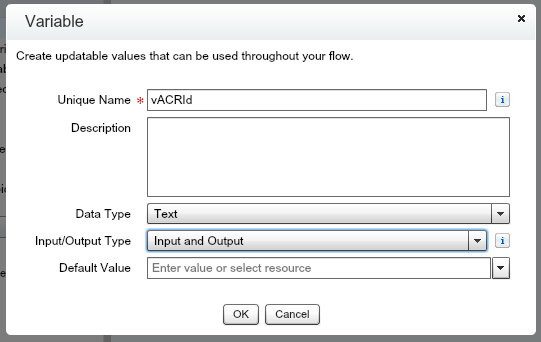
Now, it’s time to build your Flow! Go to Setup, Flows, New Flow. First, you’re going to create a variable to send into the Flow, the Account_Custom_Role Id. Go to Resources, then Variable and double click it. For the Unique Name, enter vACRId (for Variable Account Contact Role Id), the Input/Output Type to Input and Output, and click OK.
Drag a Fast Lookup element onto the Canvas. Enter the Name and Unique Name as flACR for Fast Lookup Account Contact Role. In Look up, find Account_Contact_Role__c. For the Field, select Id, Operator as Equals, and Value as {!vACRId}.

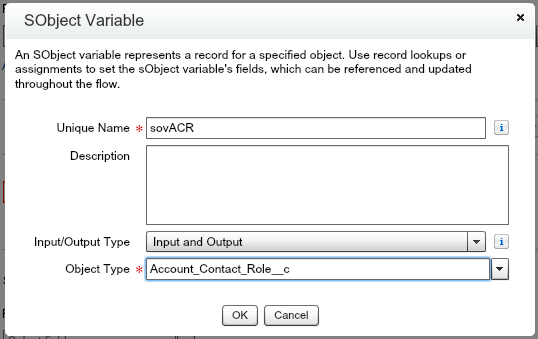
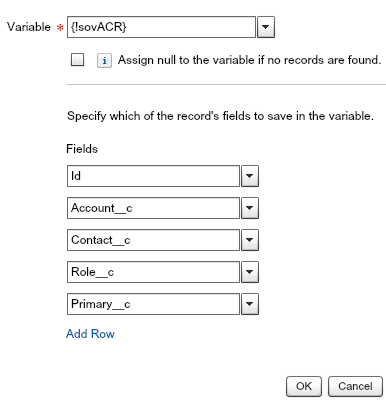
For Variable, click Create New, then sObject Variable. For the Unique Name, enter sovACR (for sObject Variable Account Contact Role), set to Input and Output for the Input/Output Type, the Object Type as Account_Contact_Role__c, and Click OK.
For Fields, select Id, Account__c, Contact__c, Role__c, and Primary__c. Click OK.
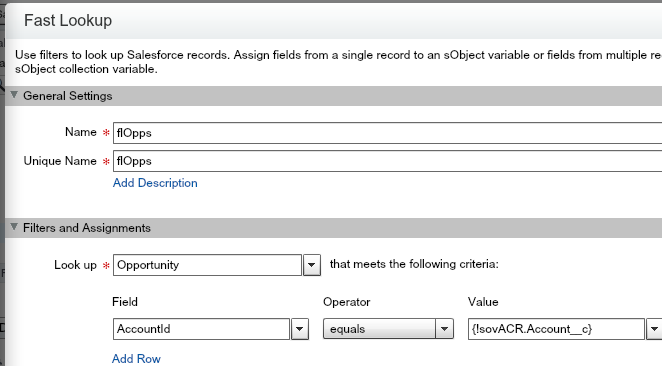
Now, it’s time to find the Ids of all Opportunities where the Account Id of the Opportunity is the same as the Account Id of the Account Contact Role (Not the Account Id of the Contact!). Get a Fast Lookup from the Palette and drag it below the Fast Lookup flACR.
For the Name and Unique Name, add flOpps (for Fast Lookup Opportunities), Look up the Opportunity Object, the Field should be AccountId, Operator should be Equals, and Value should be {!sovACR.Account__c}.
For the Variable, click Create New, then sObject Collection Variable. For the Unique Name, enter socvOpps (for sObject Collection Variable Opportunities), Input/Output Type to Input and Output, and Object Type to Opportunity.

Click OK. Check the box for Assign null to the variable if no records are found. For the Fields, select Id.

Click OK.
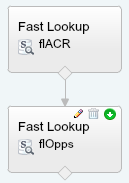
Create a connection from the flACR Fast Lookup to the flOpps Fast Lookup.
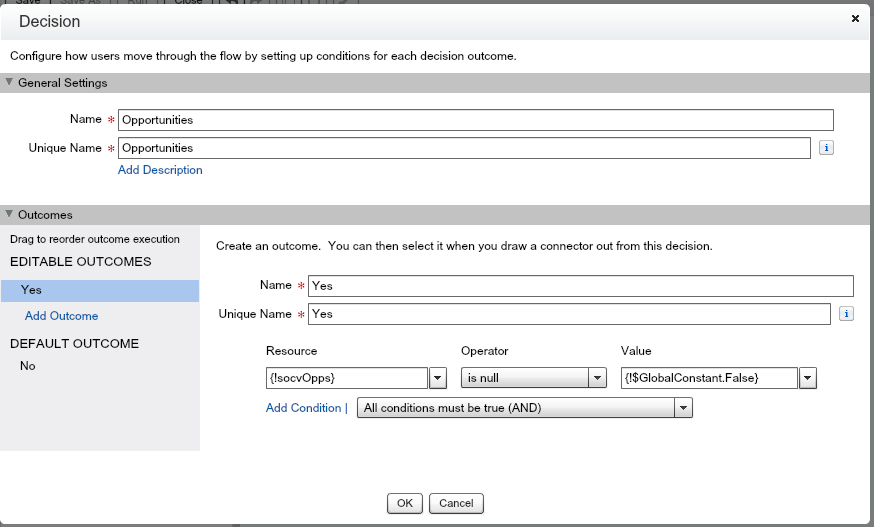
Drag a decision element to the Canvas below the flOpps Fast Lookup. Name and Unique Name should be Opportunities. For the Editable Outcomes, enter Yes as the Name and Unique Name. For Resource enter {!socvOpps}, for Operator enter Is Null, and for Value enter {!$GlobalConstant.False}. For the Default Outcome, enter No.
 Click OK.
You might be asking, what is the purpose of the decision element? Well, I’m glad you asked! If there are no Opportunities that are tied to the Account, we don’t need to add the Account Contact Roles to the Opportunity Contact Roles since there are none. So this will stop the Flow from creating an error if there are no Opportunities associated with the Account.
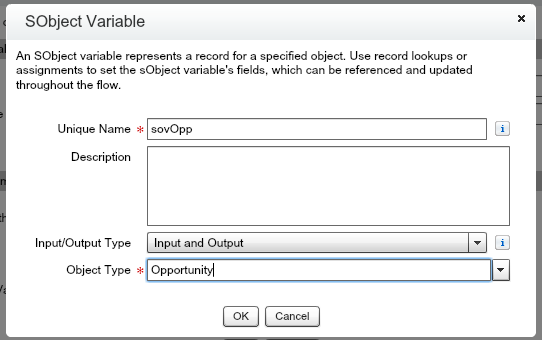
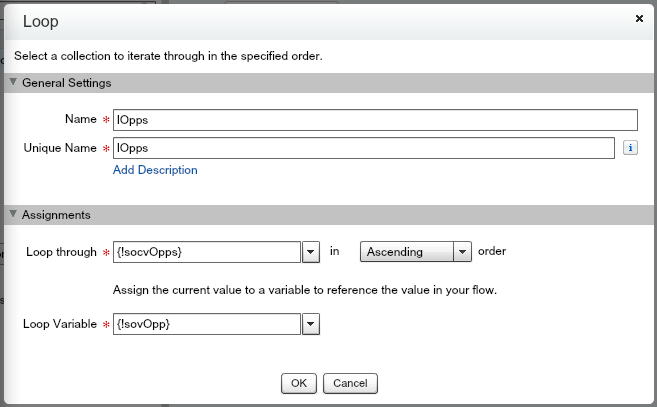
Connect the flOpps Fast Lookup to the Opportunities Decision Element. Drag a Loop Element to the right of the Opportunities Decision Element. Type the Name and Unique Name as lOpps (for Loop Opportunities), Loop through socvOpps in Ascending order. For Loop Variable, create a new sObject Variable, sovOpp (for sObject Variable Opportunity) for the Unique Name, Input and Output as the Input/Output Type, and Object Type as Opportunity.
Click OK.
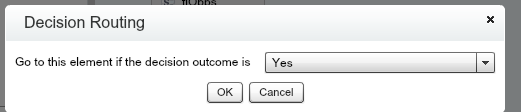
Click OK. Connect the Opportunities Decision Element to the lOpps Loop Element. For the Decision Routing, select Yes.
Click OK.
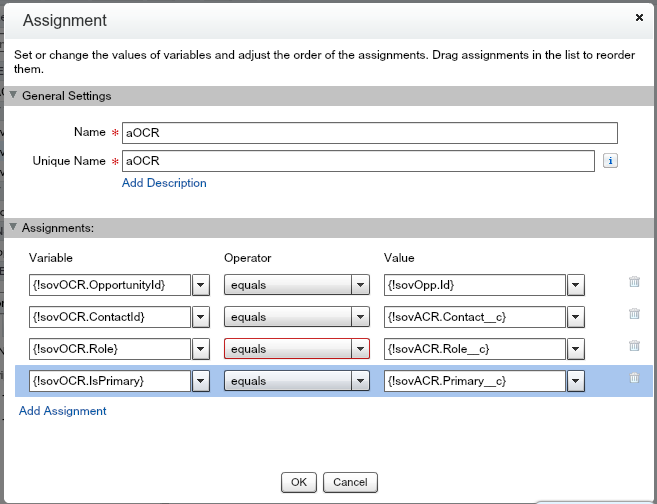
Drag an Assignment Element to the right of the lOpps Loop Element. Enter the Name and Unique Name as aOCR (for Assign Opportunity Contact Role). For the Variable, click Create New, select sObject, for Unique Name enter sovOCR, Input/Output Type to Input and Output, and Object Type to OpportunityContactRole.

Click OK.
Set the Variable of the aOCR Assignment Element to {!sovOCR.OpportunityId}, Operator to Equals, and Value to {!sovOpp.Id}. Click Add Assignment. For Variable enter {!sovOCR.ContactId}, Operator select Equals, and Value as {!sovACR.Contact__c}. Click Add Assignment. For Variable enter {!sovOCR.Role}, Operator as Equals, and Value as {!sovACR.Role__c}. Click Add Assignment. For Variable select {!sovOCR.IsPrimary}, Operator as Equals, and Value as {!sovACR.Primary__c}.
Click OK. Connect the lOpps Loop to the aOCR Assignment. For Loop Routing, select For Each Value In The Collection.
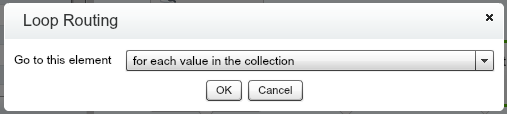
Click OK.
Drag another Assignment Element below the aOCR Assignment Element. For the Name and Unique Name, enter aOCRUpdate. For Variable, click Create New, sObject Collection Variable. Enter the Unique Name as socvOCR, Input/Output Type as Input and Output, and Object Type as OpportunityContactRole.

Click OK.
Leave {!socvOCR} as the Variable, for the Operator select Add, and for Value select {!sovOCR}.
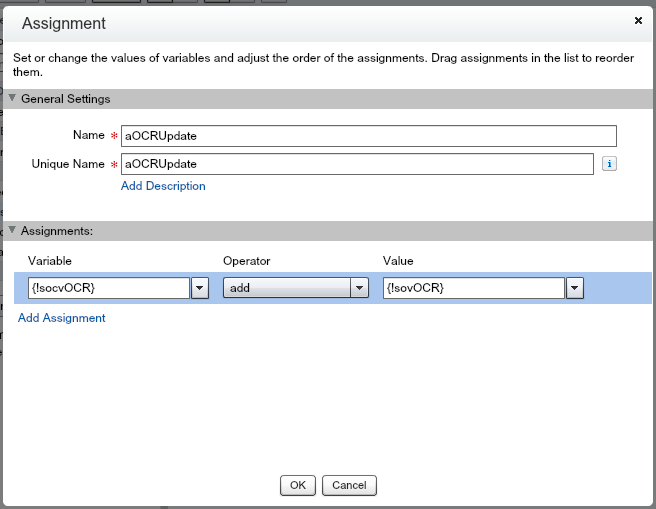
Click OK.
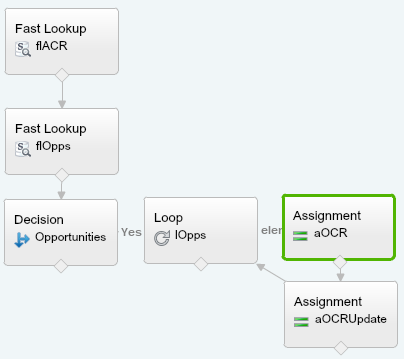
Connect the aOCR Assignment Element to the aOCRUpdate Assignment Element and the aOCRUpdate Assignment Element to the lOpps Loop Element. Your Flow should look something similar to this.
Drag a Fast Create Element to the Canvas below the lOpps Loop Element. Enter for the Name and Unique Name fcOCR (for Fast Create Opportunity Contact Role) and the variable to be socvOCR.
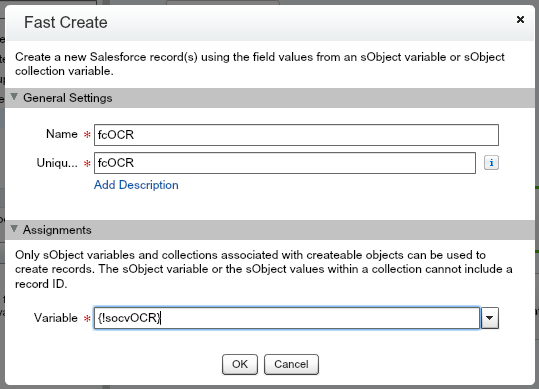
Click OK.
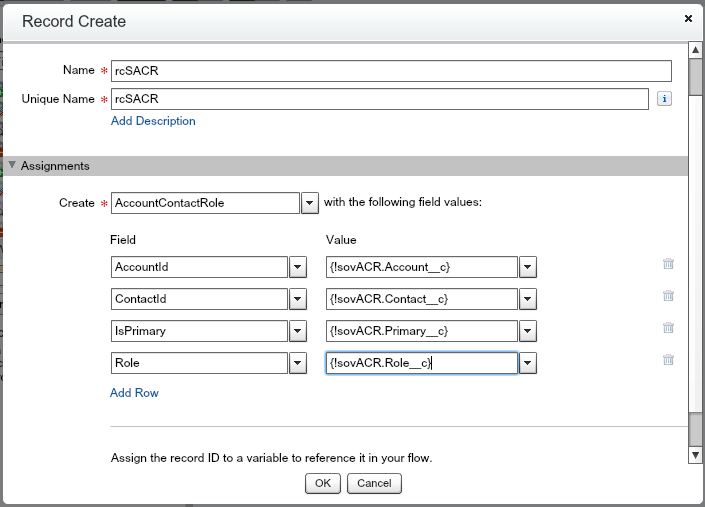
Connect the lOpps Loop Element to the fcOCR Fast Create Element. Congrats, that will create the Opportunity Contact Roles for each of the Opportunities tied to the Account that the Account Contact Role was created from! One last thing. Since a Custom Object was used, it makes sense to still add the standard Account Contact Role, just in case there is a need for it. Drag a Record Create Element and drop it below the Opportunities Decision Element and to the left of the fcOCR Fast Create. Enter the Name and Unique Name as rcSACR (for Record Create Standard Account Contact Role). For Create enter AccountContactRole. For Field enter AccountId and Value as {!sovACR.Account__c}. Click Add Row. Enter ContactId for Field and {!sovACR.Contact__c} for the Value. Click Add Row. Select IsPrimary for the Field and {!sovACR.Primary__c} as the Value. Click Add Row. Select Role for the Field and {!sovACR.Role__c} for the Value.
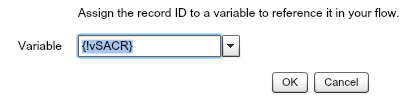
For the Assign the record ID to a variable to reference it in your flow, create a new Variable, Unique Name as vSACR (for Variable Standard Account Contact Role), and Input and Output for the Input/Output Type.
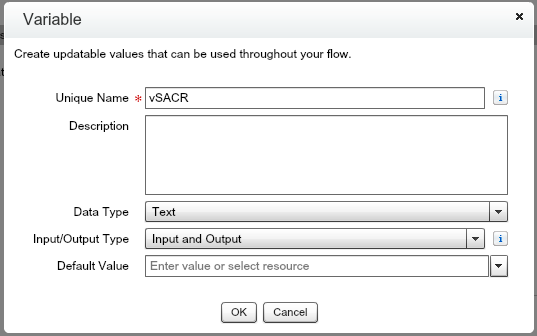
Click OK.
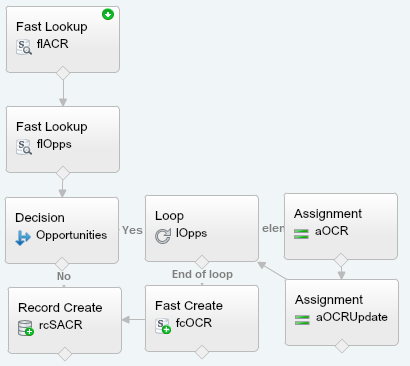
Click OK. Connect the Opportunities Decision Element to the rcSACR Record Create Element and connect the fcOCR Fast Create Element to the rcSACR Record Create Element. Set the Start Element to the flACR Fast Lookup Element.
Your Flow should look like the below Flow.
Save your Flow, Name as ACR Create OCR, Unique Name as ACR_Create_OCR.
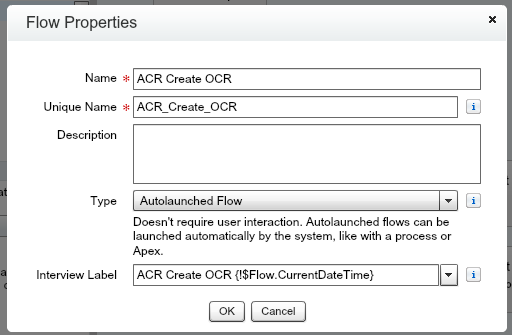
Click OK.
Great. Now you have a Flow that will do what you need, but this is where you need some Lightning to kick it off! (I know, I know, I did the Lightning thing again! 🙂 )
Close the Flow and Activate it. In the Setup Search bar, type Process Builder.
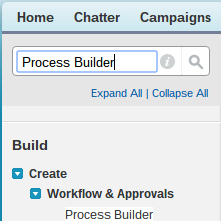
Click on Process Builder. Click New from the right side. Enter the Name as New ACR to Launch ACR Create OCR Flow and the Description as Upon creation of ACR, this will send the ACR Id to the ACR Create OCR Flow.
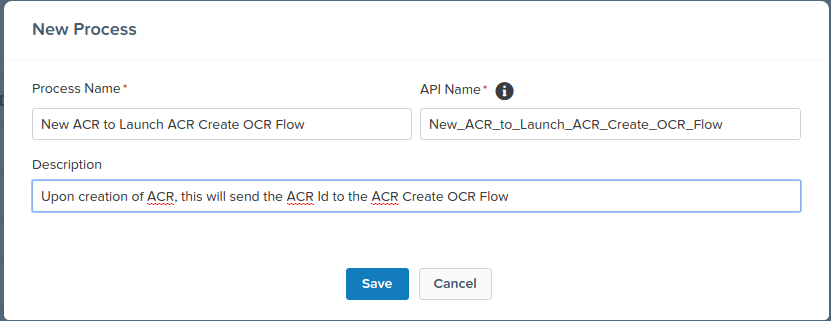 Click Save.
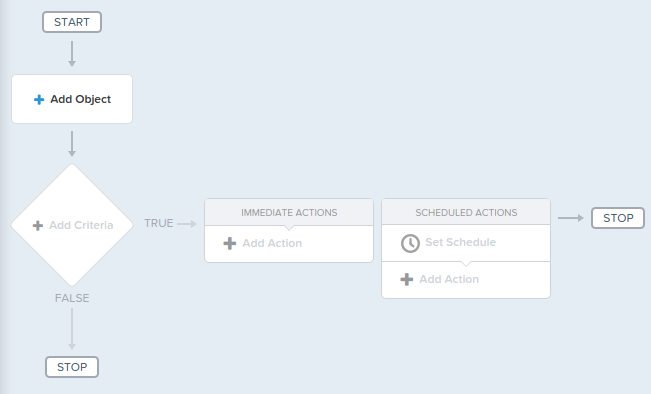
Click + Add Object.
In the Object drop down, select Account Contact Role.
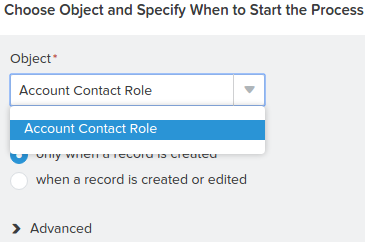
Start the process should be left with “only when a record is created” selected. Click Save.
Click + Add Criteria.
For the Criteria Name enter Always and select the radio button for “No criteria-just execute the actions!”
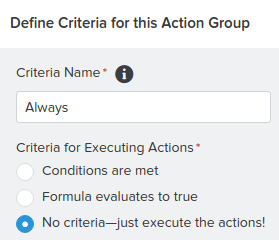
Click Save.
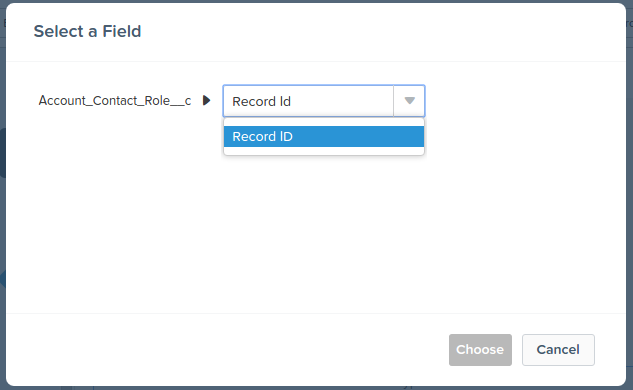
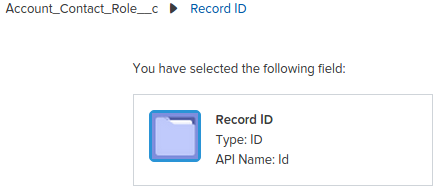
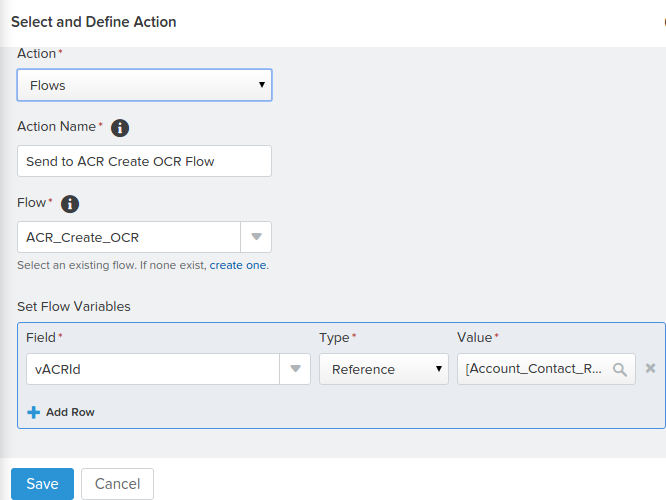
Click + Add Action under Immediate Actions. For the Action, select Flows. For the Action Name, enter Send to ACR Create OCR Flow. Select the ACR_Create_OCR Flow. Click + Add Row in the Set Flow Variables. For Field select vACRId, Type as Reference, Value as Id.
 Click Save.
Click Activate in the upper right hand corner! Click OK for the warning message.
Congrats! Now go test out your new Thunder and Lightning! (Last time I promise!)
You are now officially a Flownatic!!!
What other Flows/Process Builder processes would you write around this? Perhaps if the Role changes, update the standard Account Contact Role and the Opportunity Contact Roles? Would you change the Opportunity Contact Role addition to just Opportunities that are Open? Let other readers know your thoughts in the comments and make sure to get involved in the Salesforce Community, Official: Salesforce Workflow Automation!
A big thanks to Jay Singh for the desire to learn about Flows!

Thanks a lot.
LikeLike