Create Line Items Using Flow – Learning Flow 2.A

This is the first post in the second part of the Learning Flow series.  In this part of the Learning Flow series, you’ll learn how to add Line Items using Pricebooks.  Although this will eventually tie to Quotes as part of the Learning Flow series, it also applies to Opportunity Products (Line Items) and Order Products (Line Items).  You’ve already shown the Pricebooks to your Users in the Quote Entry Flow, so now you’ll need to display the Products in the Pricebook for your Users to select.

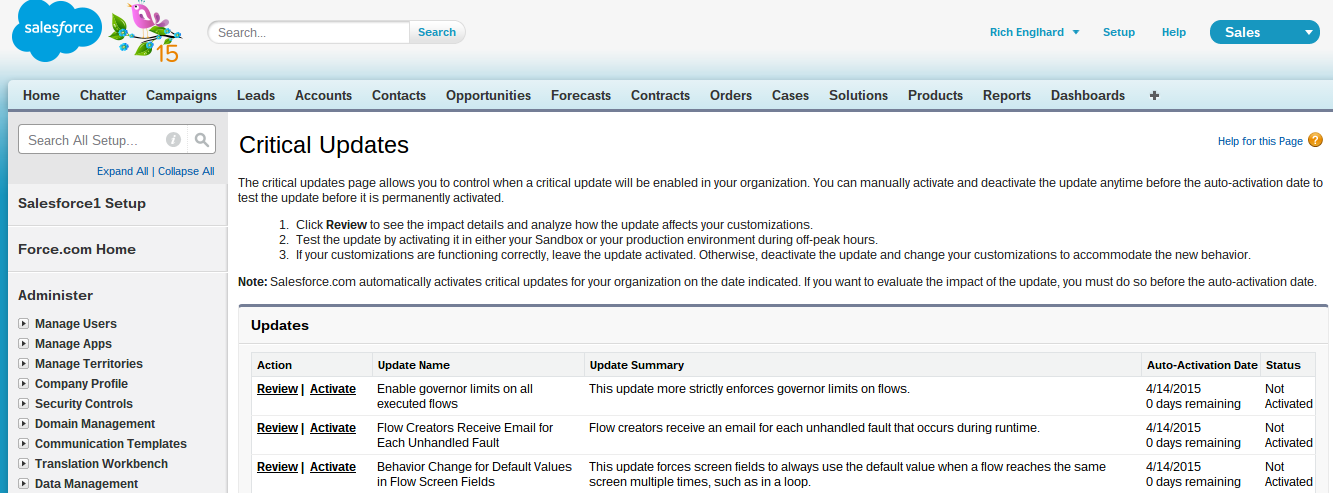
There are a few things you need to do before creating the Quote Line Item Flow.  Go to the Setup menu, then in the search bar enter Critical Updates and click on Critical Updates.  There are two Critical Updates that you need to Activate.  The first is the one that says Flow Creators Receive Email for Each Unhandled Fault (so you get notified on faults!) and the second is Behavior Change for Default Values in Flow Screen Fields.  The behavior change is very important as you’ll see later.  Click Activate next to both of them.

Flow Critical Updates

Now, it’s time to create the Quote Line Item Flow!  First, go to Setup, Flows, create a New Flow.  Click on Resources, then double click SObject Variable.  Enter the Unique Name as sovQuote, Input/Output Type as Input and Output, and Object Type as Quote.  This SOject Variable allows you to pass the information from the Quote Entry Flow (you’ll set it up later) as well as update Quote fields as needed.

Continue reading

Create an Input Screen for Users, Assign Variables, and Create a Quote – Learning Flow 1.A

This is the first post for the Learning Flow series to learn how to write and use Salesforce Visual Workflow (Flows) and the first post for Part 1, Main Quote Information, where you will learn how to use the Fast Create element, Screen element, and Assignment element in Flows.  You will also learn about sObjects and Flow Validation (similar to Validation Rules, but with one BIG difference).  You’ll create an input Screen for Users to enter information about the quote, Assign Variables to the quote from the inputs of the User, and create the quote.

Since this is the first part of Part 1 of the Learning Flow guide, you may need to set up quotes.  If you have a new developer instance or are testing in your sandbox (always test before sending to production!) and you haven’t turned quotes on, go to the Setup menu, click on Quote, and click Settings.  Enable Quotes and append Quote Related Lists to the Opportunity Page Layouts that will need to see Quotes.

OK, now that Quotes are set up, start by creating a new Flow.  After you open your Flow, drag the Screen element from the Palette into the canvas on the right.  Name the Screen, “Quote Entry”, and let Salesforce automatically create the Unique Name by pressing tab.  Since you will have the Flow continue on to another element after this screen (Assignment element), you want to change the Navigation Options from, “Show Finish and Previous buttons” to “Don’t show Finish button”.  For now, also uncheck the “Show Pause button”.

Quote Entry Initial Flow Screen

You want to check with your Users and Management to find out what the requirements are for gathering data and creating quotes.  For this lesson, you want to have the User enter in a Description, pick an Expiration Date for the Quote, Name the Quote and finally set the Status to Draft.  To start, click the Add a Field tab at the top of the Screen element area next to General Info.   Continue reading