Welcome to part 2.B of the Learning Flow series where you’ll learn how to loop through a collection variable and create a roll up summary. As part of the Learning Flow series, this post adds on to 2.A taking you through the Quote Line Item part of a Flow to help your Users build a Quote.
For this section, the business has requested that the Quote store the total number of items purchased. You have two products, one that is sold in cases, with 12 items per case, and one that is sold in packs, with 3 items per pack. A typical role up summary isn’t available since the quantity doesn’t include the number of units and the number of units doesn’t include the quantity calculation. Here is a mathematical view.
Product X – Sold by the case – 12 Items per case
Product Y – Sold by the pack – 3 Items per pack
Order A: quantity 5 of Product X, quantity 3 of Product Y
A roll up summary of Quantity would be 8 and Items would be 15. Now, you could create a new field on the Product Line Item, total units, and have that roll up to the Quote in another field, total units. Although that’s possible, imagine that the company is out of Roll Up fields for the Quote object. Flows to the rescue!
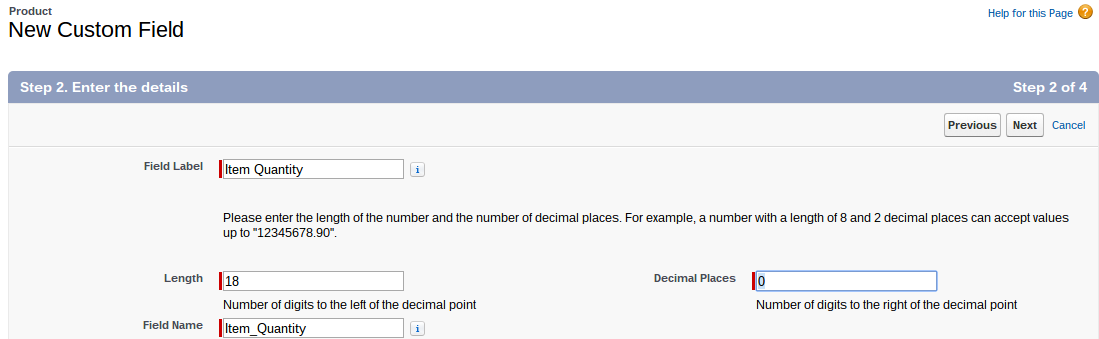
To get started, you’ll need to create the products. Go to setup and type Product in the Setup search bar. Create a new field in the product Object, Item Quantity. The Data Type should be Number, the Field Label as Item Quantity, Length should be 18, Decimal Places 0, and Field Name should be Item_Quantity.
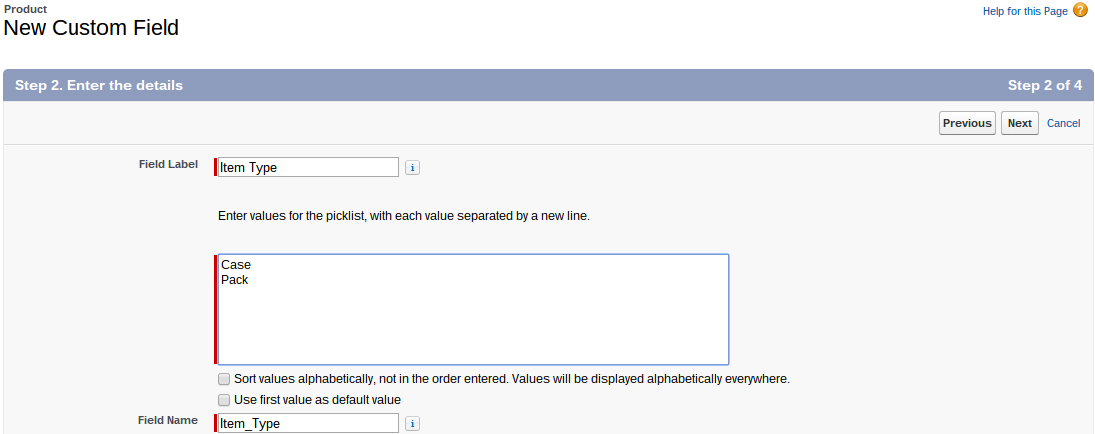
Field visibility should be available to all and read-only should stay unchecked. Add the field to the Product Layout. Click Save and New. Create this field as a picklist field. Enter the Field Label as Item Type, the values as Case and Pack, and the Field Name as Item_Type.
Make the field visible to all and leave read-only unchecked. Add the field to the product layout. Click Save.
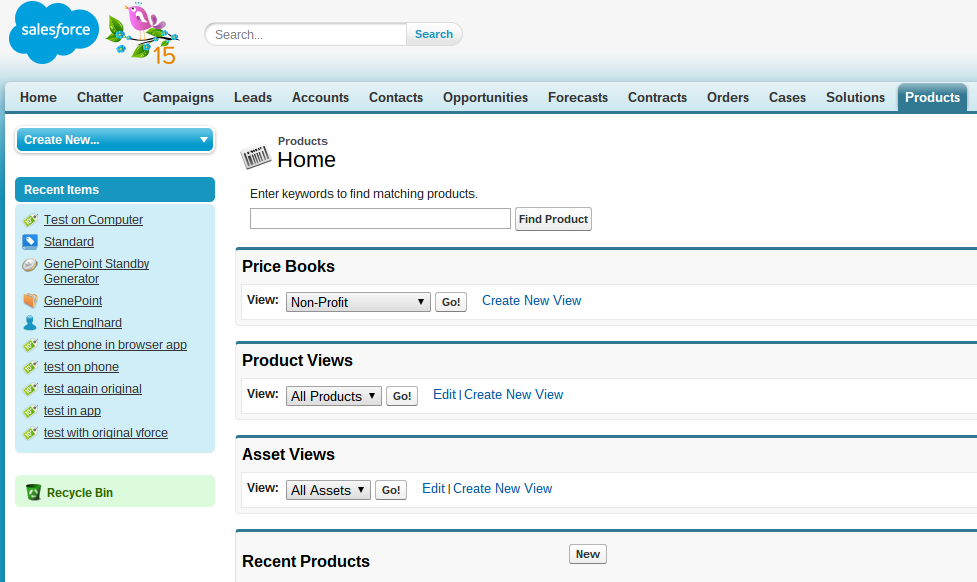
Now, go to the product tab and create a new product.
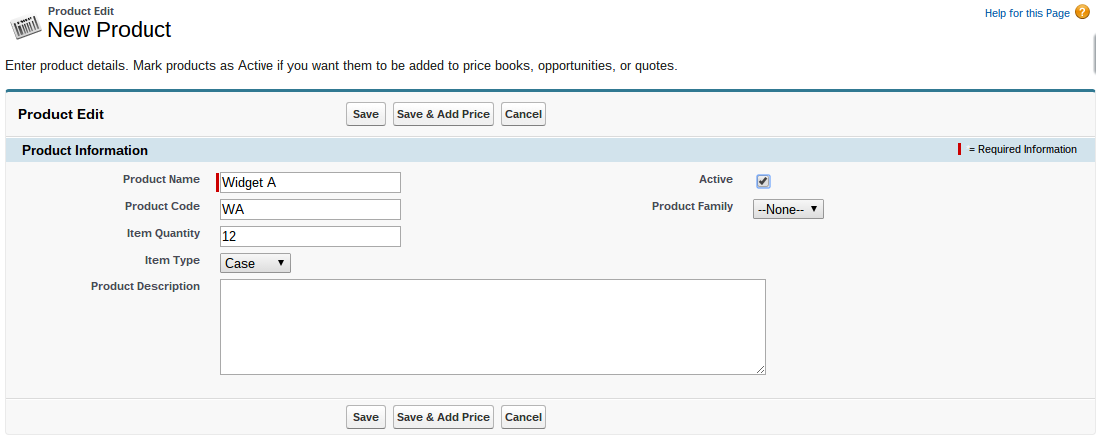
Name the product Widget A, the Product Code should be WA, Item Quantity should be 12, Item Type should be Case, Active should be True.
 Click Save & Add Price. Enter Standard Price as 100 and click Save & New Product. Enter the Product Name as Widget B, Product Code WB, Item Quantity 3,Item Type as Pack, and Active as True.
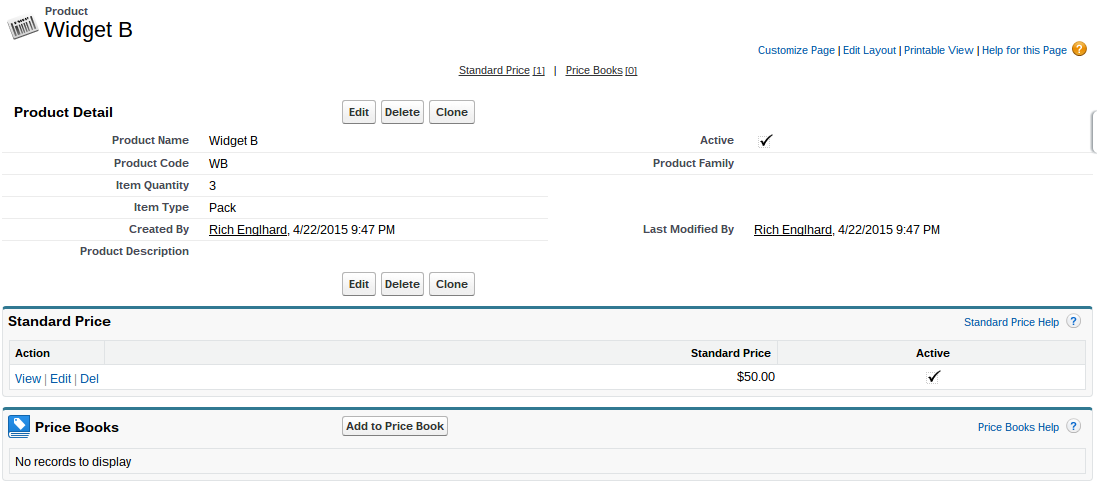
 Click Save & Add Price. Enter the Standard Price as 50 and click Save. You should see the below image.
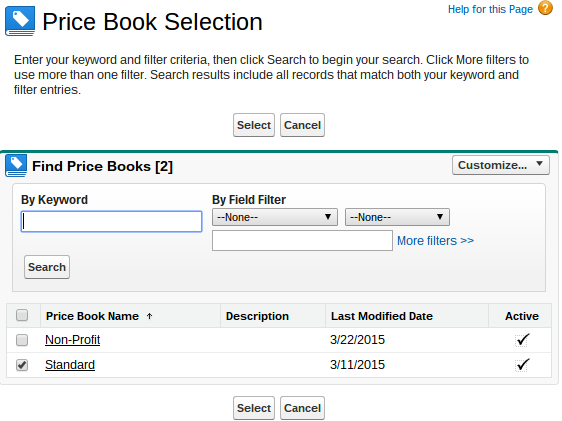
Click Add to Price Book at the bottom. Check the box next to Standard and click Select.
Click Use Standard Price and click Save.
 You’ll need to add Widget A to a Price Book as well. Go to Widget A and Add it to the Standard Price Book as well and also check Use Standard Price.
The next field you’ll need to add is a field on the Quote, the master object of the roll up field. Go to the Quote object and create a new field. The Data Type should be Number, the Field Label should be Total Items, the Length 18, Decimal 0, and Field Name Total_Items.
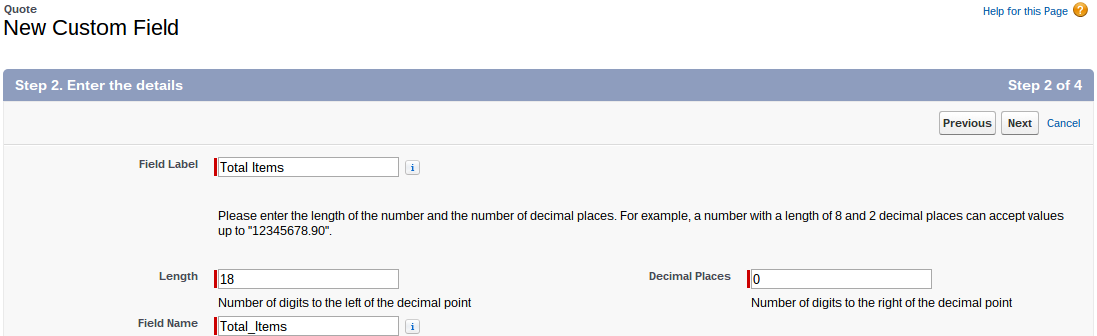
Click Next, make the field visible to all and leave read-only as unchecked, click Next. Finally, add the field to the page layout. (Make sure to make the field read only on the page layout so Users don’t change the field value!) Click Save.
The next field to create right now is on the Quote Line Items object. Go to Quote Line Items object and create a new field. Select Data Type as Number, click Next, and Enter the Field Label as Item Quantity, Length 18, Decimal Places 0, and Field Name as Item_Quantity.
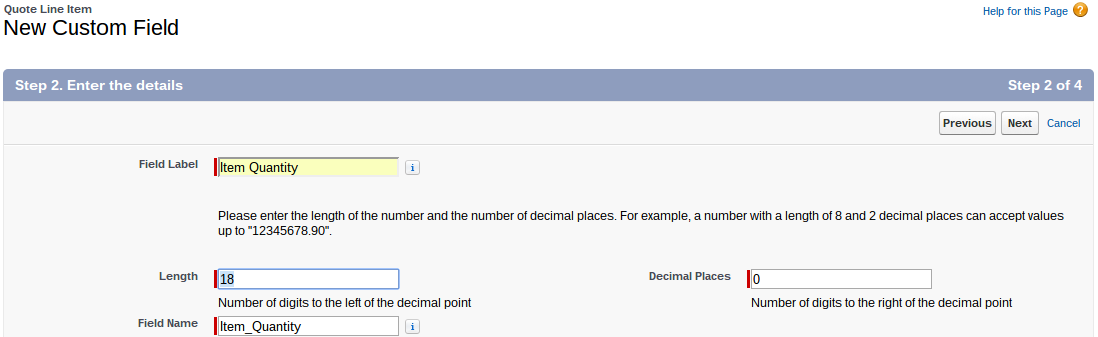
Click Next. Set Visible to all and leave Read-Only as unchecked. Click Next. Add the field to the page layout. Click Save. This field will allow you to create the roll up field much easier when going through the loop in your Flow!
Now, to create the last field, go to Price Book Entries and create a new field. Create this as a Data Type of Formula. Enter the Field Label as Item Quantity and the Field Name as Item_Quantity. Set the Formula Return Type as Number with the Decimal Places as 0.

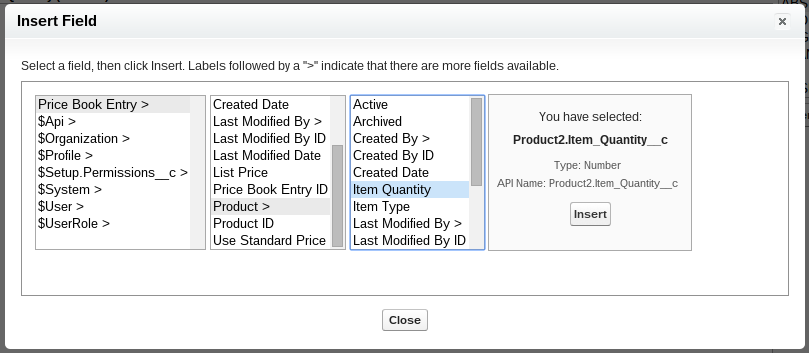
Click Next. For the formula, enter the Product’s Item Quantity as a formula, Product2.Item_Quantity__c . You can get the formula by clicking Insert Field, selecting the Price Book Entry object, then the Product object, then the Item Quantity Field.
Since you don’t want to have any errors with values, select the Treat blank fields as blanks since zeros would ruin your calculation! Click Next, set visible to all, click Next and then Save.
With the Products and the roll up fields out of the way, it’s time for you to enter information into your Flow.
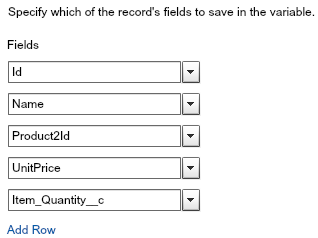
First, go to the flPricebookEntry Fast Lookup element. Click Add Row at the bottom in the section where it says, “Specify which of the record’s fields to save in the variable.” For the value, select Item_Quantity__c.
Click OK.
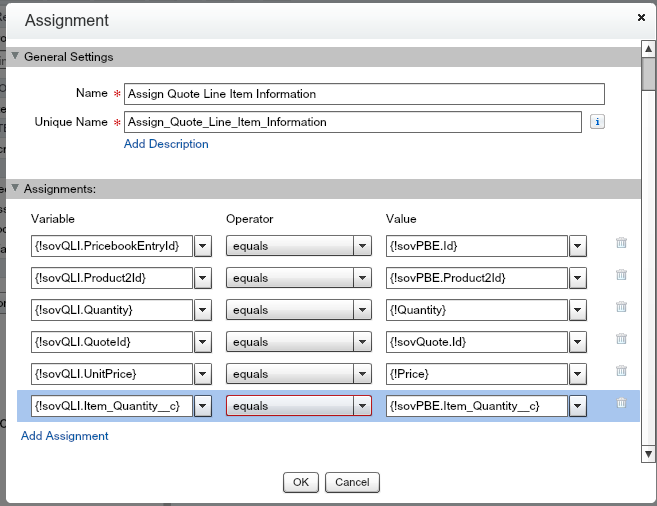
Next, go to the Quote Line Item Flow that you created in Learning Flow 2.A. Open up the Assign Quote Line Item Info Assignment Element. Click Add Assignment at the bottom and enter {!sovQLI.Item_Quantity__c} as the Variable, Operator as equals, and Value as {!sovPBE.Item_Quantity__c}.
Click OK.
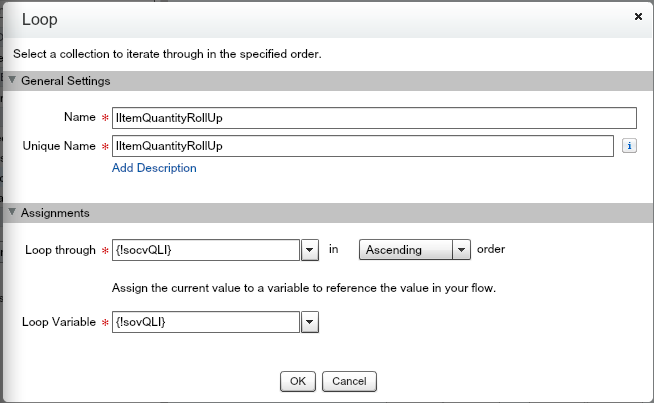
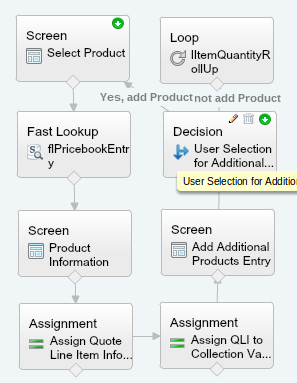
In the Palette, click on Loop and drag it above the User Selection for Additional Decision Element. For the Name and Unique Name, enter lItemQuantityRollUp. For Loop through, select socvQLI, and for the Loop Variable select sovQLI.
 Click OK. Connect the User Selection for Additional Decision Element to the lItemQuantityRollUp Loop Element. So far, the Flow should look like below.
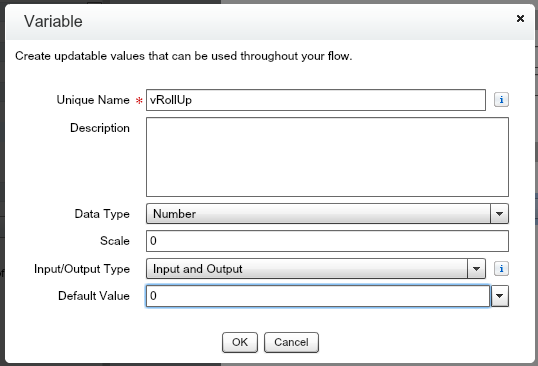
Now, go to the Palette and select the Assignment element, drag it to the right of the lItemQuantityRollUp Loop. Set the Name and Unique Name as aRollUp. For the Variable, click the drop down arrow and select Create New, then Variable. Set the Unique Name as vRollUp, Data Type as Number, Scale 0, Input/Output Type as Input and Output, and the Default Value as 0.
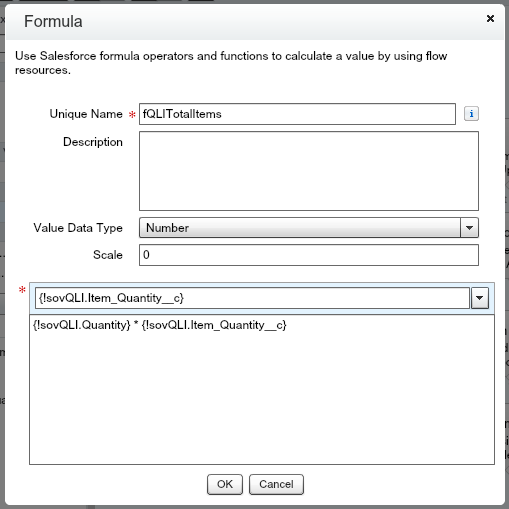
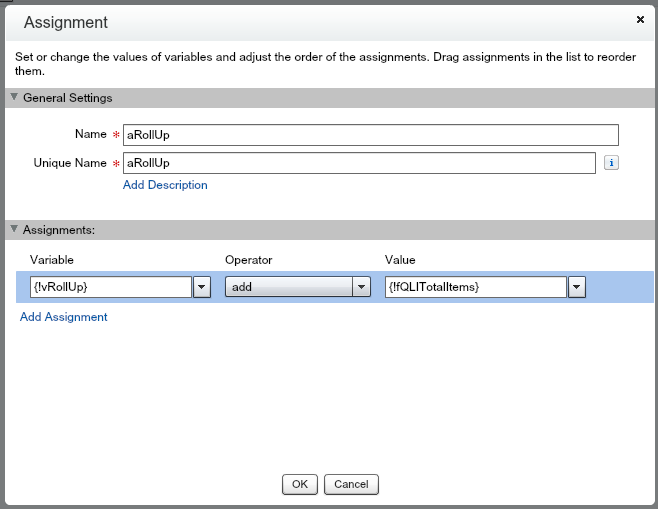
Click OK. The Variable should now show {!vRollUp}. For Operator, select Add, and for Value, select Create New, then Formula. The Unique Name for Formula should be fQLITotalItems, Value Data Type as Number, Scale 0, and the formula should be {!sovQLI.Quantity} * {!sovQLI.Item_Quantity__c}.
Click OK. The Value should read {!fQLITotalItems} and the Assignment should look like the below image.
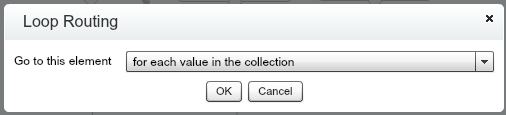
Click OK. Now connect the lItemQuantityRollUp Loop element to the aRollUp Assignment element. A pop up appears that says Loop Routing. For Go to this element, select for each value in the collection.
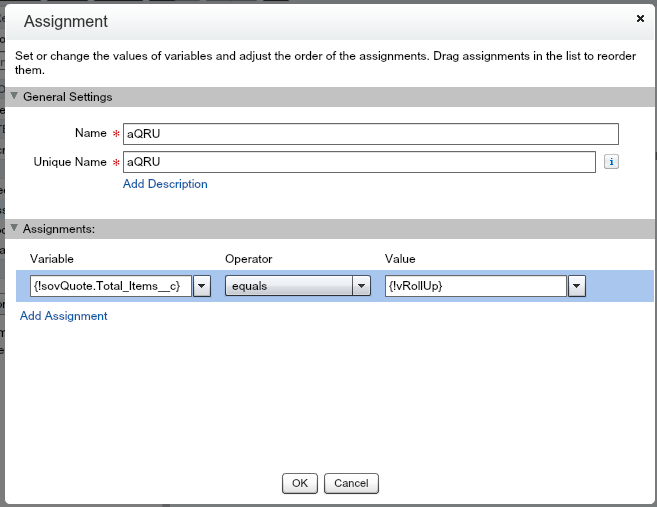
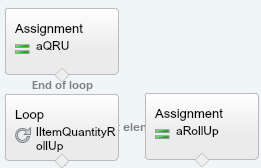
Click OK. Now connect the aRollUp Assignment element to the lItemQuantityRollUp Loop element. This will loop through every Quote Line Item in the collection variable and add the Quote Line Item Total Items (Quantity of the Line Item times the Item Quantity of the product) and add that to a variable, vRollUp, which is the value for the roll up field. In order to get the Roll Up field on the Quote, click the Palette, then drag an Assignment Element above the lItemQuantityRollUp Loop element. For Name and Unique Name enter aQRU for Assign Quote Roll Up. For the Variable, enter {!sovQuote.Total_Items__c}, for Operator select equals, and for Value select {!vRollUp}.
 Click OK. Connect the lItemQuantityRollUp Loop element to the aQRU Assignment element.
Congratulations, you’ve created a Roll Up field using Flows! The final part would be to update the Quote, which you’ll learn in the next post, Learning Flow 2.C! Make sure to Save your Flow!

I created similar flow to count items and sum the Amount of all opportunity and display in screen. It is exiting after 20 count. Do u know why?
LikeLike